Version: 9.2207xxxx
The Box Office allows you to manually add registrations to your event levels. Features of Box Office include the ability to process transactions on 'private' levels (levels that do not appear on your public registration form) and additional payment methods, for example: cash, check, complimentary ticket options.
Prerequisite:
Before using Box office, make sure to go through these:
Prerequisite: 1 Default Payment Methods for Box Office:
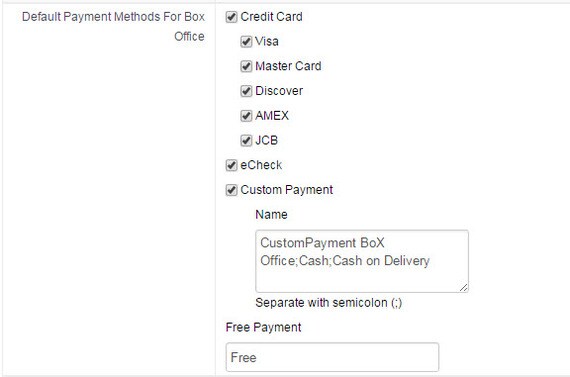
Go to C&P Event Management > Default Settings > Default Payment Methods for Box Office
The payment methods which are selected here will be reflected in the External Registration Page where the payment is made. So make sure to enable the checkbox which you want to see in the External Registration Page.
Prerequisite: 2 Enable Box Office Registration for:
Go to C&P Event Management > Default Settings > Enable Box office Registration for
Events are of three types. Active events, Upcoming events and Archived events. The Active events are the events which have not reached their end date. Upcoming events are the events which have a start date greater than today’s date (future date). Archived events are the events which passed their end date.
So the events which are enabled here will be displayed in Box office. But registrations can be made only for the Active events.
The Settings given here will reflect in the Box office section.
Event Status: Select the type of events which need to be available for registrations in the Box Office.
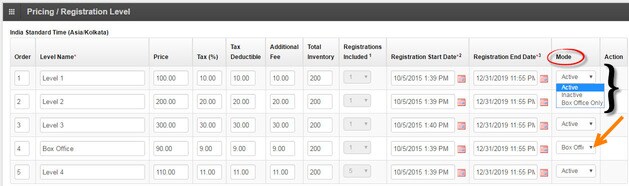
Level Status: If the status is set to ‘Active’, then all the active levels under particular event will be available in the Box Office section. If the status is set to ‘Box Office Only’, then the levels whose mode is set to ‘Box Office Only’ will display in the Box Office section. To change the level mode, go to Particular Event > Basic Information > Pricing / Registration Level > Mode (Set to Box Office Only).

Prerequisite: 3 Pricing / Registration Level:
Go to C&P Event Management > Select the desired Event > Basic Information > Pricing / Registration Level
While creating the levels for the event, selecting the mode of the level is very important. There are three types of modes in which “Active levels” will be displayed both in the External site as well as in Box office, “Inactive levels” will neither be displayed in External site nor in Box office, “Box office only levels” will be displayed ONLY in Box office.
After selecting the desired settings in the above sections, go to C&P Event Management > Select the desired Event > Box Office
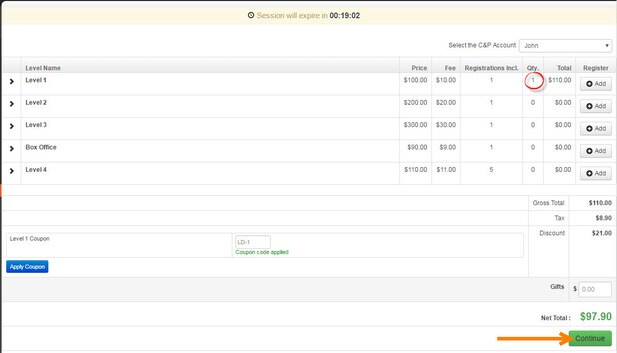
The levels which are either in Active or Box office mode (Prerequisite: 3) will be displayed here. The rest of the process is as same as the normal registrations like entering the attendee details, coupon code (if any), click on “Continue” and entering the billing and payment information before clicking on “Process” button to process the transaction successfully.
NOTE: Account Selector field will appear only when there are more than one C&P Account in an instance. Suppose if there are 3 C&P Accounts in the salesforce instance, while registering a new attendee through Existing Patron field, the system will check the attendees which are already existing in the 3 C&P Accounts.
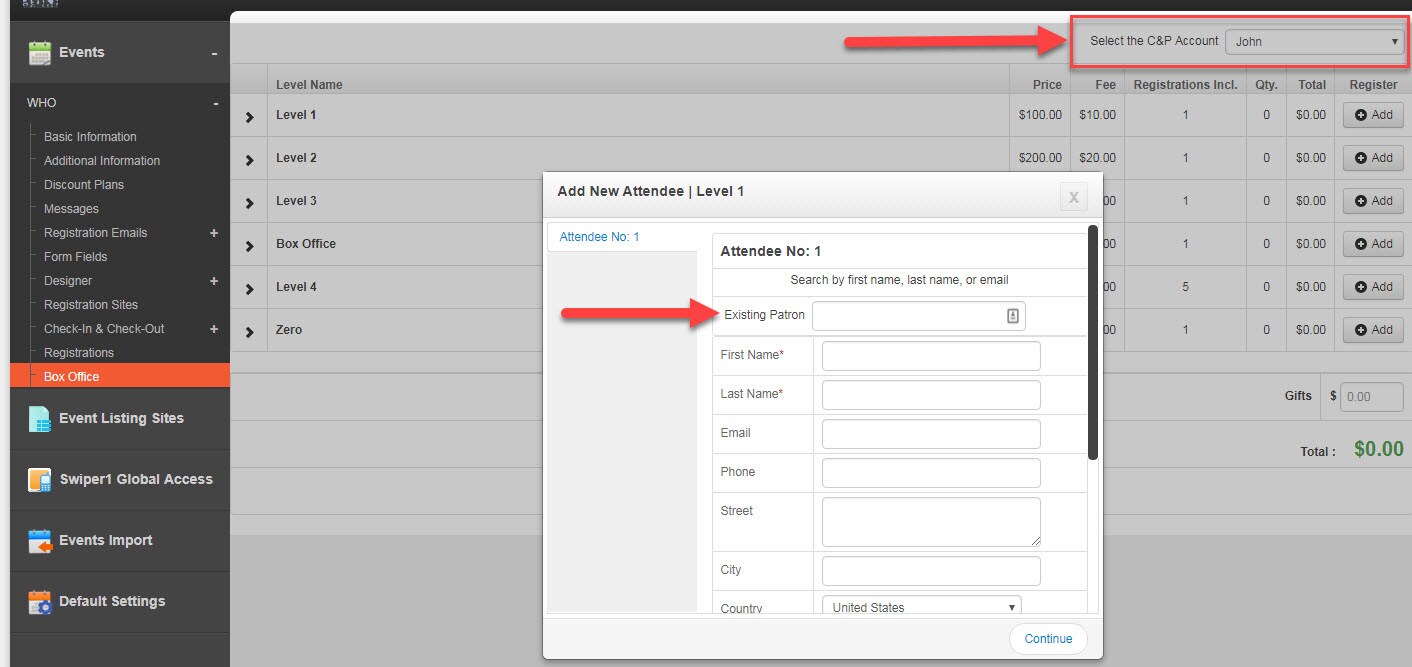
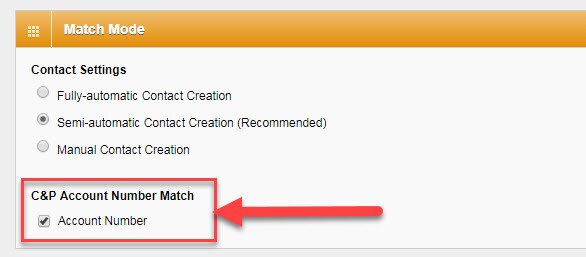
If the registrant wants to load the Attendee details only through the selected C&P Account, then he needs to enable the ‘Account Number’ under C&P Settings > Contacts & Accounts > Match Mode > C&P Account Number Match.
The Box Office allows you to manually add registrations to your event levels. Features of Box Office include the ability to process transactions on 'private' levels (levels that do not appear on your public registration form) and additional payment methods, for example: cash, check, complimentary ticket options.
Prerequisite:
Before using Box office, make sure to go through these:
- Default Payment Methods for Box Office
- Enable Box Office Registration for
- Pricing / Registration Level
Prerequisite: 1 Default Payment Methods for Box Office:
Go to C&P Event Management > Default Settings > Default Payment Methods for Box Office
The payment methods which are selected here will be reflected in the External Registration Page where the payment is made. So make sure to enable the checkbox which you want to see in the External Registration Page.
Prerequisite: 2 Enable Box Office Registration for:
Go to C&P Event Management > Default Settings > Enable Box office Registration for
Events are of three types. Active events, Upcoming events and Archived events. The Active events are the events which have not reached their end date. Upcoming events are the events which have a start date greater than today’s date (future date). Archived events are the events which passed their end date.
So the events which are enabled here will be displayed in Box office. But registrations can be made only for the Active events.
The Settings given here will reflect in the Box office section.
Event Status: Select the type of events which need to be available for registrations in the Box Office.
Level Status: If the status is set to ‘Active’, then all the active levels under particular event will be available in the Box Office section. If the status is set to ‘Box Office Only’, then the levels whose mode is set to ‘Box Office Only’ will display in the Box Office section. To change the level mode, go to Particular Event > Basic Information > Pricing / Registration Level > Mode (Set to Box Office Only).
Prerequisite: 3 Pricing / Registration Level:
Go to C&P Event Management > Select the desired Event > Basic Information > Pricing / Registration Level
While creating the levels for the event, selecting the mode of the level is very important. There are three types of modes in which “Active levels” will be displayed both in the External site as well as in Box office, “Inactive levels” will neither be displayed in External site nor in Box office, “Box office only levels” will be displayed ONLY in Box office.
After selecting the desired settings in the above sections, go to C&P Event Management > Select the desired Event > Box Office
The levels which are either in Active or Box office mode (Prerequisite: 3) will be displayed here. The rest of the process is as same as the normal registrations like entering the attendee details, coupon code (if any), click on “Continue” and entering the billing and payment information before clicking on “Process” button to process the transaction successfully.
NOTE: Account Selector field will appear only when there are more than one C&P Account in an instance. Suppose if there are 3 C&P Accounts in the salesforce instance, while registering a new attendee through Existing Patron field, the system will check the attendees which are already existing in the 3 C&P Accounts.
If the registrant wants to load the Attendee details only through the selected C&P Account, then he needs to enable the ‘Account Number’ under C&P Settings > Contacts & Accounts > Match Mode > C&P Account Number Match.