Allow your patrons to update their payment and contact information for their recurring donations, thus minimizing payment failures and saving valuable staff time managing recurring payments.
NOTE: The first time a patron still on Propay uses the Recurring Updater, C&P will ask that they update their credit card information.
The article includes:
Set-up
Login Page Settings
Contact/Card/Cancellation Permissions
Amount & Intervals
Recurring Transactions with Expired Campaign
Set-up
Set-up for the Recurring Updater in CONNECT under Settings. Login to CONNECT at login.connect.clickandpledge.com. Follow the steps below to access the Recurring Updater.
- Click on the Launcher icon (four white squares) in the upper right corner.
- Click on Settings
- Click on Recurring Updater in the menu on the left.
Enable Recurring Updater
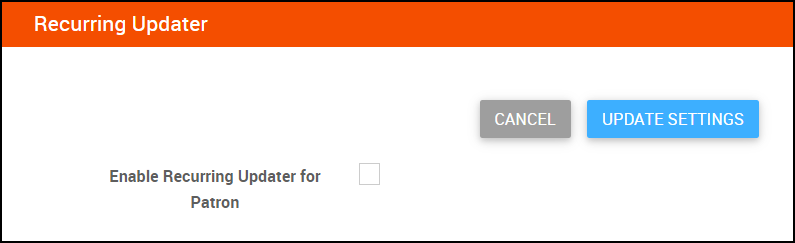
Check the box to enable the Recurring Updater and click the Update Settings button.
Login Page Settings
Page Background Color: Set the background color for your login page.
Here is an example of the Login page. The Login page uses the header and footer from your CONNECT Peer-to-Peer Site where they may be edited. For more information please refer to the Knowledge Base article on Peer-to-Peer Site: CONNECT: Peer-to-Peer Site
- Your organization name as it is displayed on your Click & Pledge account will appear here.
- The Donation button links to the Default Form in your Default Campaign.
- Fundraisers may login to their Dashboard
- This is the optional text entered for the Login Page Message.
Contact/Card/Cancellation Permissions
Check the boxes for the fields you will allow the patrons to change.
Amount & Intervals
When you enable the "Allow patron to change the following attributes" the change for any of these fields will result in the start a new recurring transaction linked to the original order. Changes to these fields cannot be made for Installments. The following table compares subscriptions and installments.
Recurring Transactions with Expired Campaigns
If you select "Allow Update if Campaign is Deleted or no Campaign found" the new recurring payment will be assigned to the Default Campaign. For Peer-to-Peer campaigns, you may also assign Fundraisers and Teams to the default campaign.
If you do not select allow the Campaign to be updated, you may customize the language of the message patrons will see when they attempt to edit their recurring donation.
The "View Page" Button
Patron Access
- clicking the link in the "recurring declined" email generated when there is an issue processing a recurring donation
- clicking the link in the receipt
- clicking the link in an email from your organization
The "Copy Link" Button
Click the COPY LINK button to get a link to send your patrons via email. Note: This link will not include an order number for them. You will need to provide that in the email.
The Link that Includes the Order Number
To send a link with the order number included go to Settings > Transactions > Desired Order Number > Manage Recurring.
The Receipt
Existing receipts will need to be updated to include the Recurring Updater link after it is enabled. To do this, go to Launcher > Settings > Messaging & Receipt, and click edit for the receipt(s) you want to update.
Remove the existing recurring merge field(s) by clicking the delete button for each message on your receipt.
Add the recurring merge fields back to the receipt by dragging them from Receipt Elements on the left to the section where they should live on the receipt. The merge fields will include the Recurring Updater "Click Here" link which will take the donors to the Recurring Updater login screen.
This is how it looks on the receipt.
Note: Receipts created after the launch of the Recurring Updater will contain the updated recurring elements.
Patron View
A screen will open to the Billing Details tab, where the Patron can edit their name, email, and mailing address.
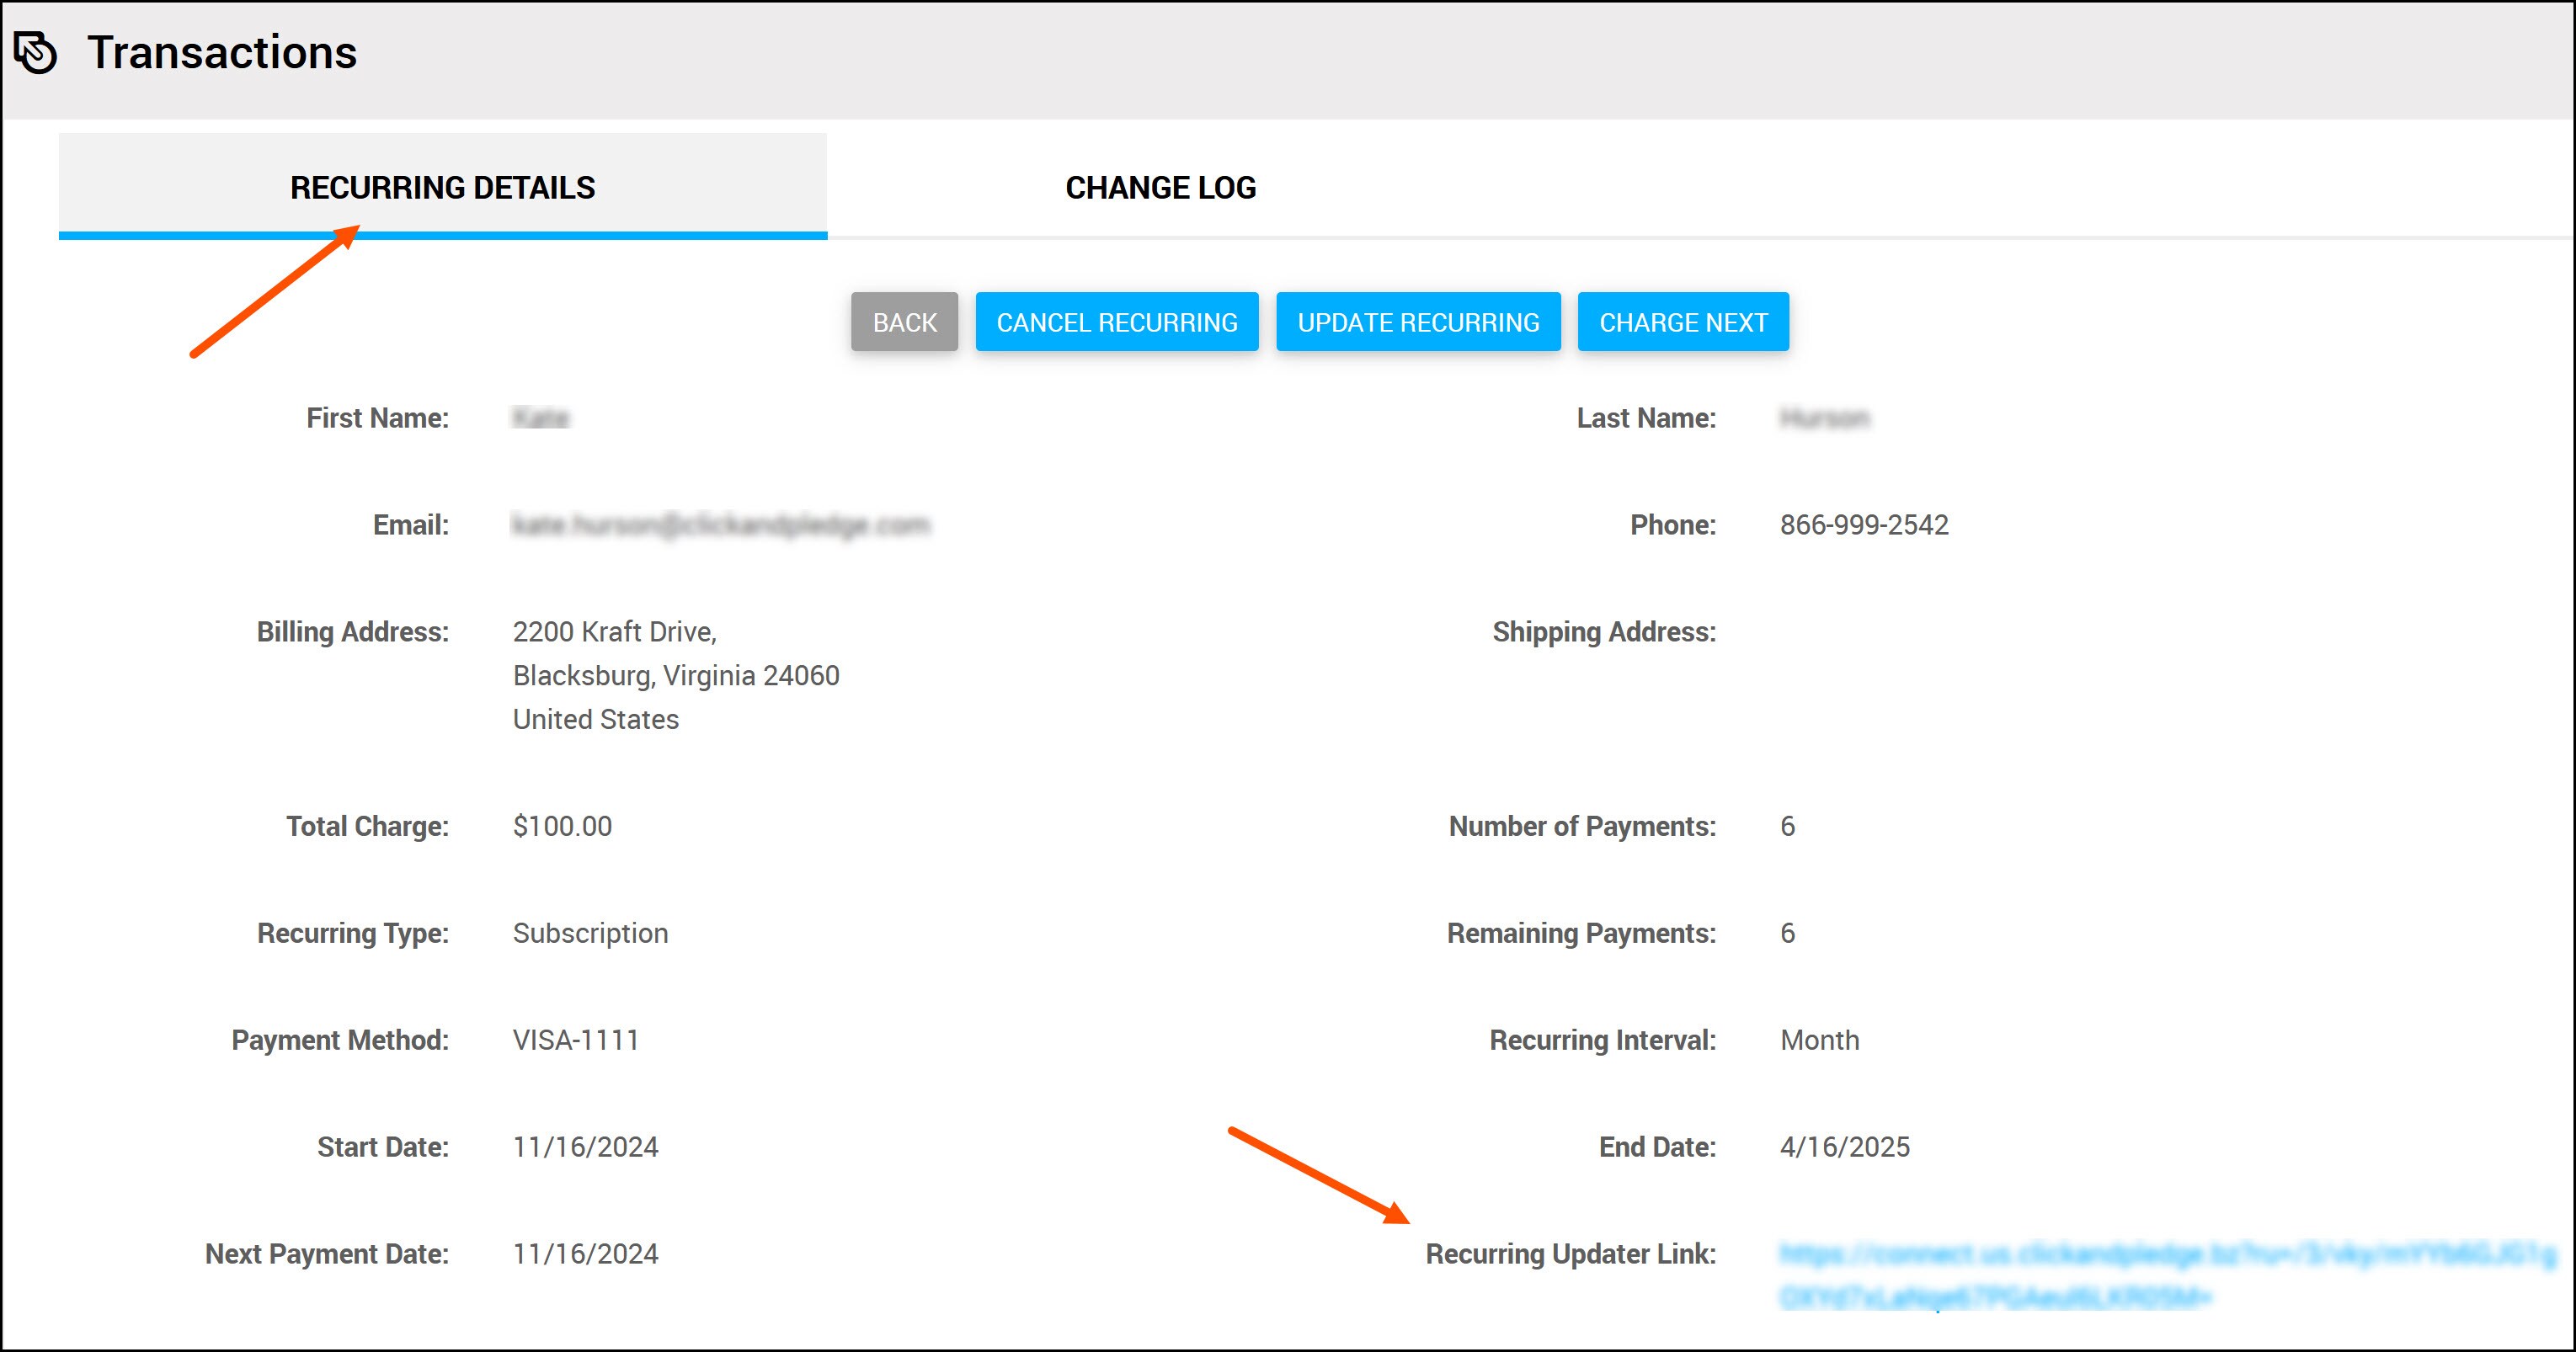
The next screen to open will have the recurring details. The transaction details - amount, type, interval, and next payment date - are all visible. Number of payments and payments remaining will be visible for campaigns where the recurring is not set to indefinite.
When the patron clicks the edit icon, information from the original donation form will be visible. In the example below we changed the number of payments to 6 and the amount to $100.
After clicking "Next step" the Transaction Details are updated in the overview.
Clicking the edit icon will open the credit card information. Bank Account and PayPal transactions can also be updated.
After clicking on "Submit" the patron will see a Thank You screen.
Organization Access
Edit Patron Recurring in Admin
If a patron asks you to change the amount of their recurring for them, you no longer need to cancel the recurring and start a new one. In addition to the update/edit options that were available to the Admin, the edit options in Transactions under Manage Recurring > Update Recurring include the edit options that the patron has in Recurring Updater.
To update recurring information in the Admin go to Launcher > Transactions & Reports > Transactions.
- Find the order number for the patron using the search field (magnifying glass) in the upper right corner.
- Click on the (blue) order number.
- Click the Manage Recurring button.
- Click Update Recurring. The Virtual Terminal will open.
The following sections/fields may be edited. When Edit is clicked, the letter used in the change log will appear.
Campaign & Fundraiser Information Change = C
- Campaign
- Team
- Fundraiser/Team member
Billing Information Change = B
- Name
- Address
- Phone Number
Shipping Information Change = S
Payment Description Change = D
Recurring Change = R
- Periodicity
- Indefinite Recurring or Number of Installments
- End Date
- Installment Amount
Tracker Change = T
Additional Questions Change = Q
Receipt Customization Change = E
Payment Method Change = P
- Credit Card
- eCheck
- Card on File
- Custom Payment Type
- Charge Date
Recurring Updater Change Log
The change log will give you a list of changes your patrons have made through the Recurring Updater. To access the change log, Transactions & Reports > Transactions > Click on Order Number > Manage Recurring > Change Log Tab
Each time a transaction is updated, a new order number is generated. All transactions are tied to the Master Order Number.
The changes that were made are reflected in the Change column, using the letters defined in the Legend.
Notifications
Decline Message to Patron
You may choose to send a decline message for a recurring transaction to patrons. This is found at Launcher > Settings > Messaging & Receipt > Messaging /Receipt Settings. You may also assign internal email addresses to receive decline notifications for recurring transactions.
Check the Send Decline Notice to Patron box and edit the email text if desired.